
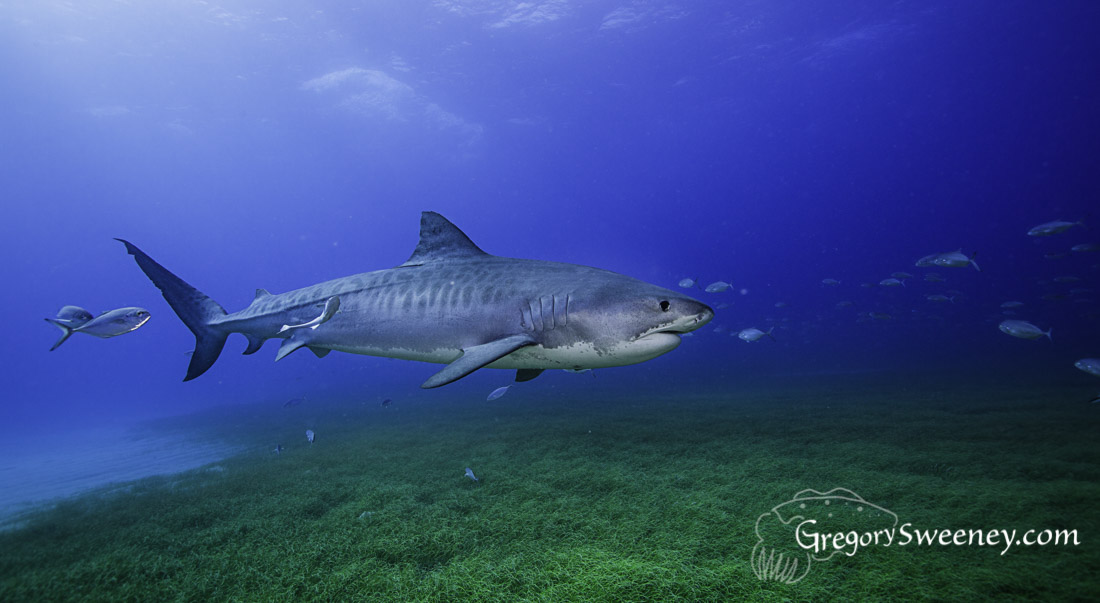
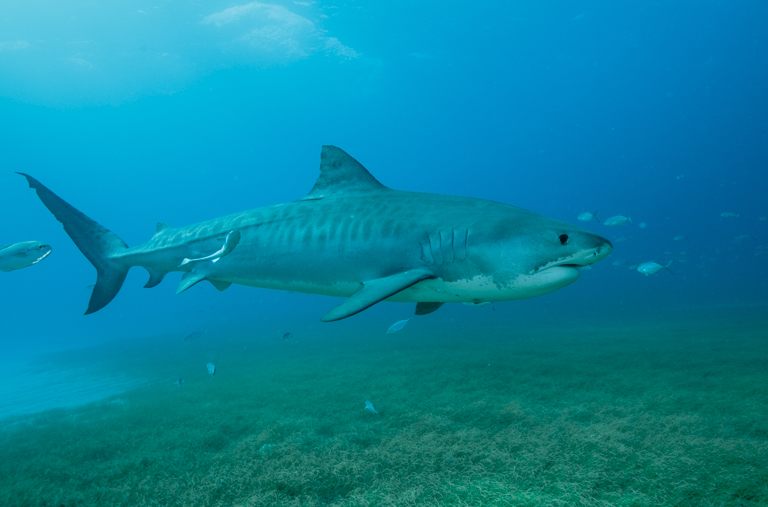
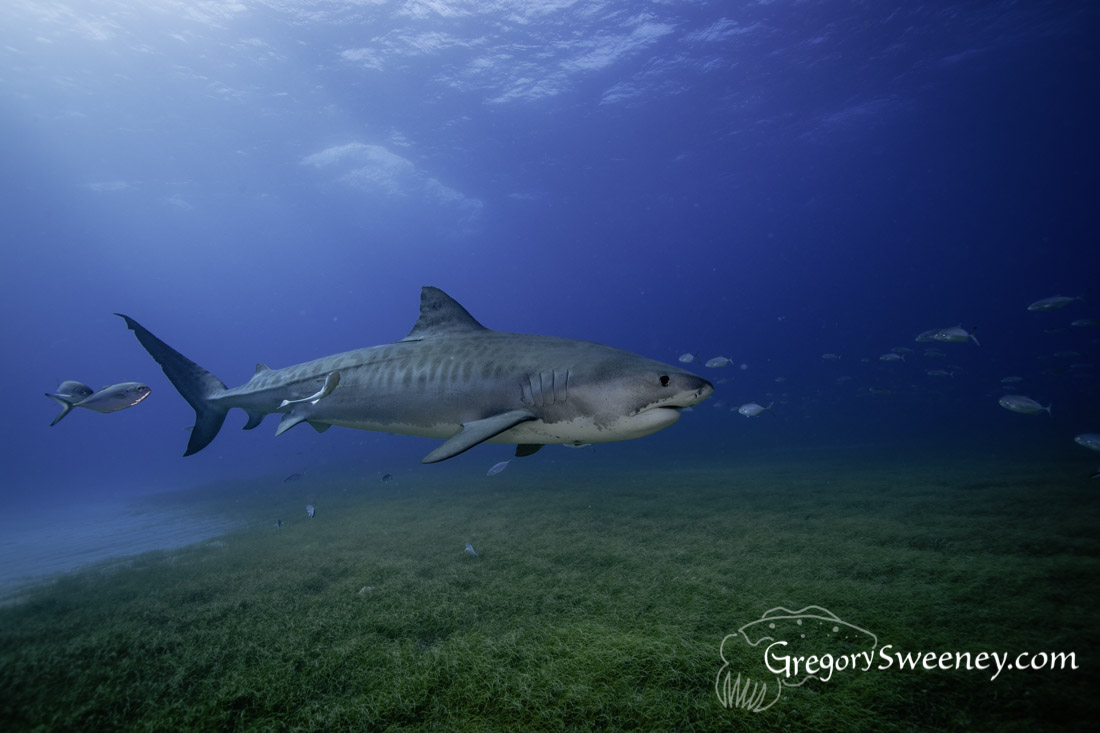
My underwater image of a tiger shark swimming over eel grass needed some processing to make it into something worthy of the cover to Underwater Photographer Magazine Issue #97
Here is how I used Adobe Lightroom to get it ready for the cover.
Images taken underwater without a flash will have a color cast due to the loss of the red spectrum of light as it travels through water.
This is a method I use to process my photos that adds back in some of the red and corrects for exposure. I prefer to leave a bit of a blue cast to the images – they are depicting underwater after all. The trick is to correct it to a point between what your brain saw during the dive and what is technically “perfect” according to the color values.
I use the tools in Adobe Lightroom to do the initial work: they are great tools and easy to use. I might move later into Photoshop to utilize layers for adjustments to specific areas taking advantage of layers, masks, etc only offered in Photoshop. I definitely will do more detailed work on the image before printing it.
By the way, Lightroom tools are the same as in Camera Raw, but I find LR’s presentation of them easier and I have the bonus of all the organization tools in LR.
The Method
Analyze then Correct Exposure
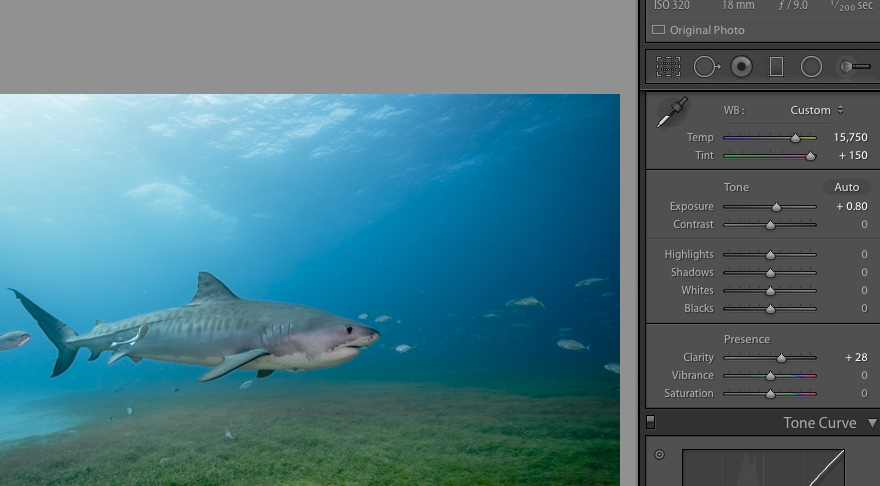
The first step is to optimize the exposure. I like to eliminate the distraction of color so I can really analyze what needs to be brighter, darker, and more contrasted. To do this I temporarily desaturate the image to black and white using the Saturation Slider (Basic Panel under Presence)
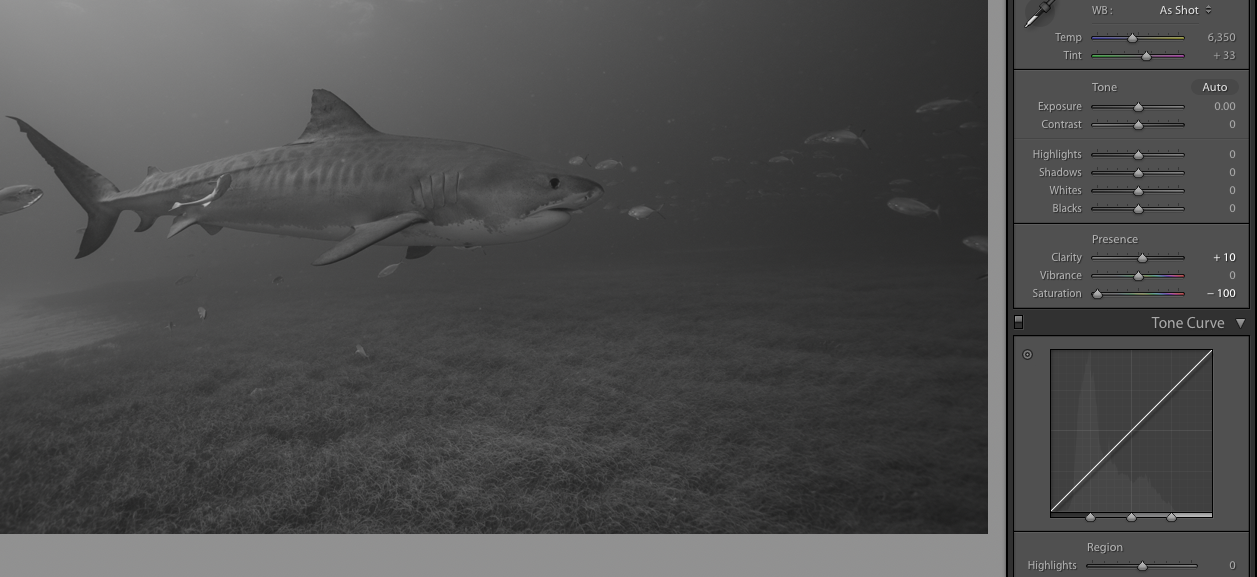
Now it is time to analyze the image: The Histogram is the first step. According to the graph, there are clear shadows, midtones, and highlights, but the whole image is too dark: there are barely any areas registering on the right hand (bright) side of the graph.
Exposure: I move the Exposure slider up until the lightest bits of water read around 62 (pass the curser over areas and read the numbers under the histogram). The overall change was +.55
In Lightroom the group of tools under Exposure (Highlights, Shadows, Whites, Blacks) are adjustments with smart logic behind them that helps the tool adapt and decide what is “whites” or “blacks” in this specific image.
For this purpose they are not doing exactly what I want so I will try the tools under ToneCurve first. Tone Curve is a degree more sophisticated and gives me the option of defining what I want to be considered Highlights, etc. In this tool, Highlights, Lights, Darks, and Shadows are marked by regions on the tone graph. I want to adjust the pointers to change the default “definitions” of Highlights, etc.
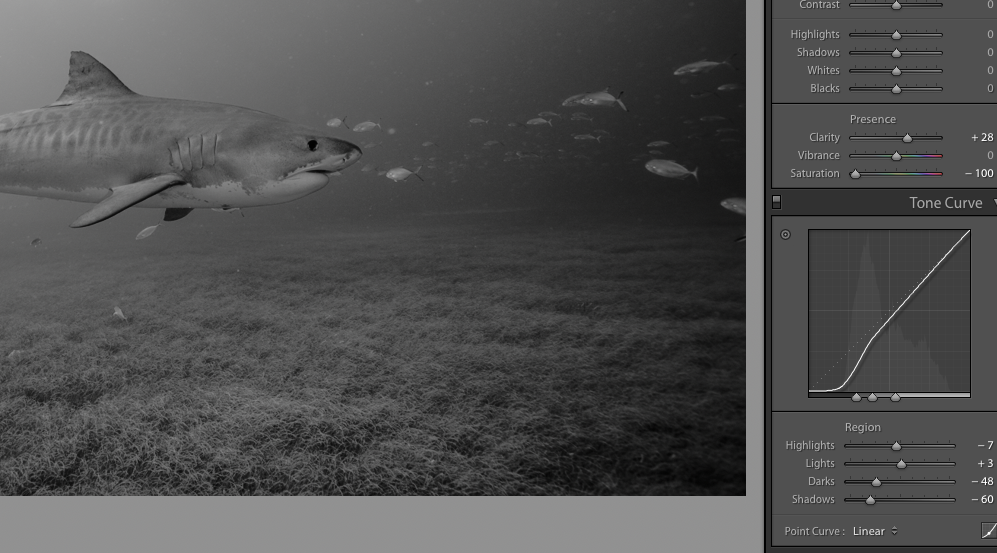
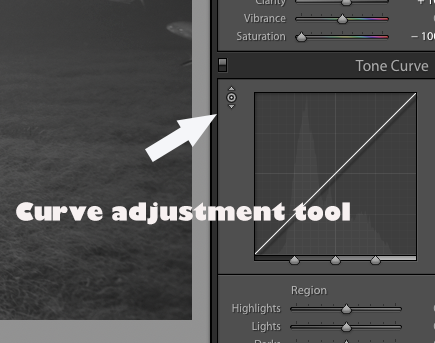
The dark edges of the fins need some contrast between them and the lighter colored body. To do this I first measure the value of the darkest areas watching where on the graph this area registers by picking up the tool at the top left of the ToneCurve (“adjust the tone curve directly”). I want to define everything darker than the “spots” of the body as “shadow” so I move the marker at the bottom of the graph over to the this spot on the graph. Now the Darks tab needs moved to the left. Using the slider for Darks you can detect what it is adjusting – I want it to just do the spots on the body and tones on the fins. Same with the Lights tab. Lights should be working on everything light except the shark’s belly and some of the sand and fish. I have now defined my exposure areas. It is time to make the adjustments.
Now I add a touch of the Clarity slider to pop the midtone contrast – this really brings out the stripes on the tiger shark.

For spot exposure corrections, Lightroom has a Radial Filter tool which can brighten or darken an oval area in the same manner as a graduated filter or a free form brush type tool that can “paint” on adjustments. I find the radial tool better and easier to use than the Adjustment brush.
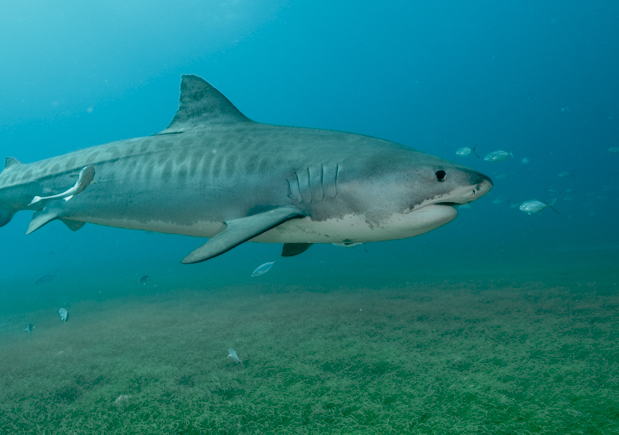
Correcting Color Using White Balance and HSL Panel Controls
Everything is brighter and more contrasted, the colors look more intense, but the color cast is still there. I use the White Balance eyedropper tool and pass it over the image. You want to choose a place that Should Be either black, white, or neutral grey. In the Navigation (on the left fly out panel) window it shows you a preview of the white balance correction if you click in that space. When I choose a spot on the belly of the shark it makes the correction, but it is too much for my taste. After the correction, I back off the sliders under White Balance a little bit back to the left toward the original cool tones.
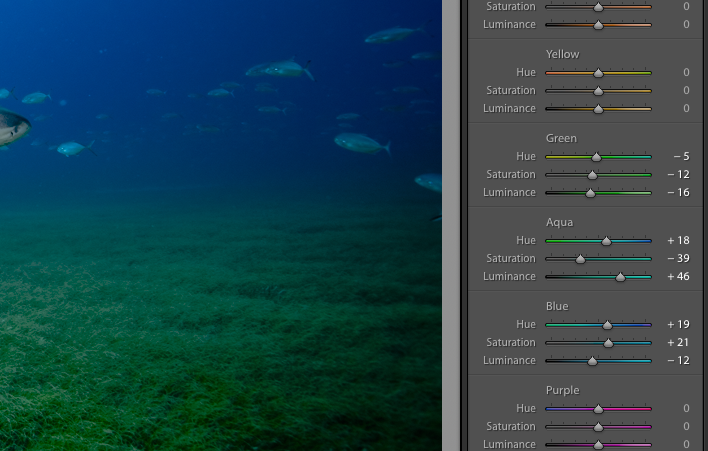
Now I have the problem of the water not having as nice of a color – it has gone a bit dull – so I go down to the panel labeled HSL/Color/B&W tools. I like the presentation of the tool that they label Color, so click on where it says Color and the tool changes to show each color and all three characteristics under it: Hue, Saturation, and Luminance .
Dropping Saturation on the Aqua slider a bit helps the color cast and increasing the Luminance to +20 helps the contrast as well. On the Blue slider I increase the Saturation to make the blue water pretty again and then a decrease of the Luminance darkens the water and makes it a richer tone with more contrast to the whole image. I also push the Hue of the blue up a tiny bit without going too much or the water becomes purple. Since there is quite a bit of green in the image, I darken then Luminance on the green channel, desaturate it a touch then shift the Hue slightly to the yellow side of green.
A few final touches: use the adjustment brush on the shark with some desaturation and white balance adjustment to take some Aqua/Blue out of the shark. Also edit the first adjustment to the white belly and chin that you did earlier to add in desaturation to move the white closer to white. The final adjustment is a tiny bit of the Dehaze tool. This bumps up the contrast and intensifies the colors.
You can also add a bit of Post Crop Vignette to darken the edges.
Also See:
Tiger Shark & Hammerhead Dive 2017
Using the Shadows / highlights command in Photoshop
Tiger Shark and Hammerhead Trips for 2018