Each year I pull together a collection of images that summarize all of the wildlife photography and wildlife encounters I had this past year. This year I thought I would try a theme of Black and White / Monochrome.
There are many tools that will help you process your digital images into monochromatic images; Photoshop, Lightroom, and numerous third party and plugin softwares. Even within Photoshop and Lightroom there are dozens of ways to achieve the black and white look and spirit.
For this collection of images I challenged myself to use many of the different techniques available to me in the Photoshop and Lightroom toolset.
The first challenge was which images to choose: not every image is powerful in monochrome / Black & White. Contrast, range of tonality (black to highlights), sharpness , and separation of subject and background / features are all important for making a successful monochrome image. Color can be necessary to understand the subject and the setting, but sometimes it is just a distraction. It is these times when the image can be elevated by removing the color (or most of it)
Here are the highlights of my year and a bit about how I processed the images.
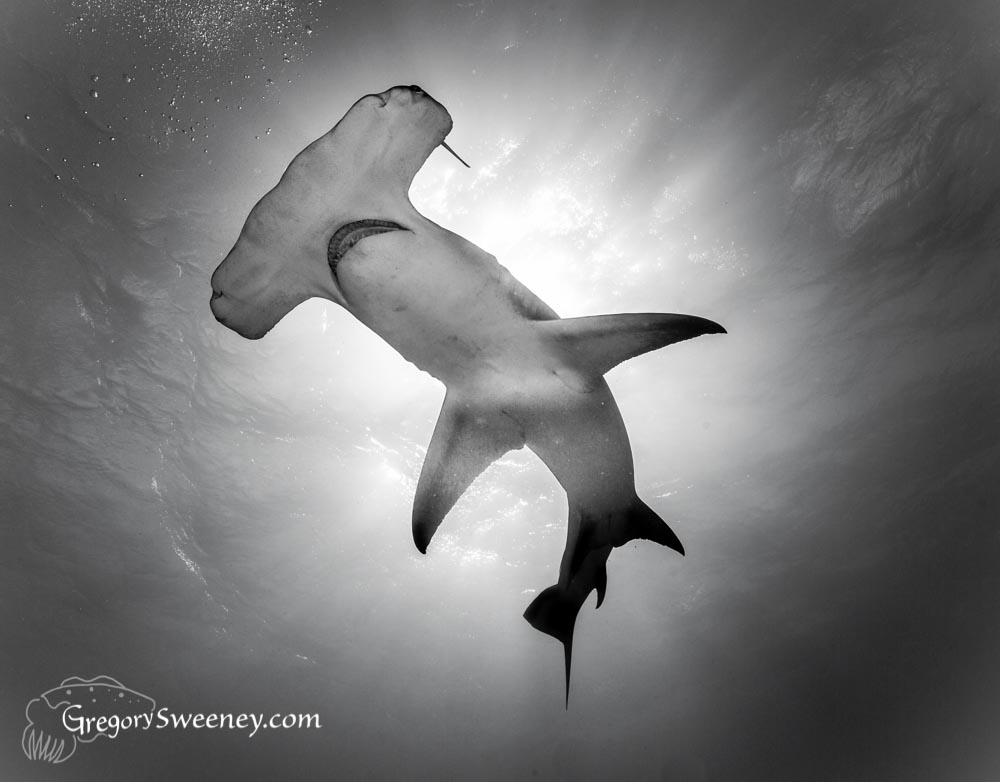
January: Hammerhead Sharks in Bimini
Processed in Lightroom: In the color tools I desaturated on most of the individual color channels but to a less extent on the Aqua and BLue channels to leave a tint. I use the overall Saturation slider to remove more color . Increase contrast with the exposure sliders or curves. The fish eye lens has made it very dark on the edges so I compensate for this with a crop and a Post Crop Vignette to lighten the edges and take some of the circle effect away. Finally I use Clarity and Sharpen
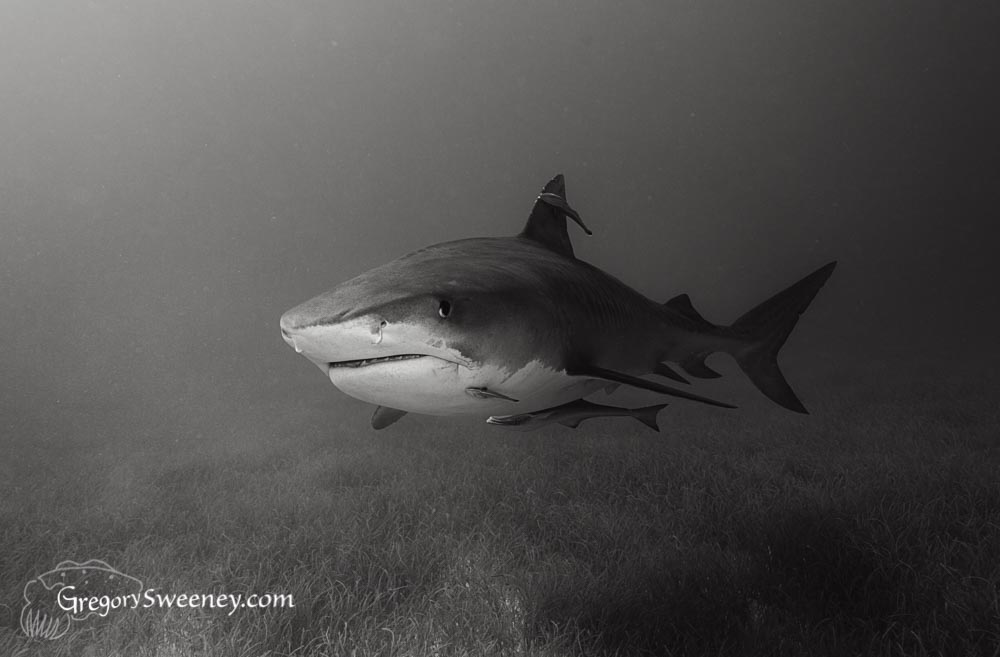
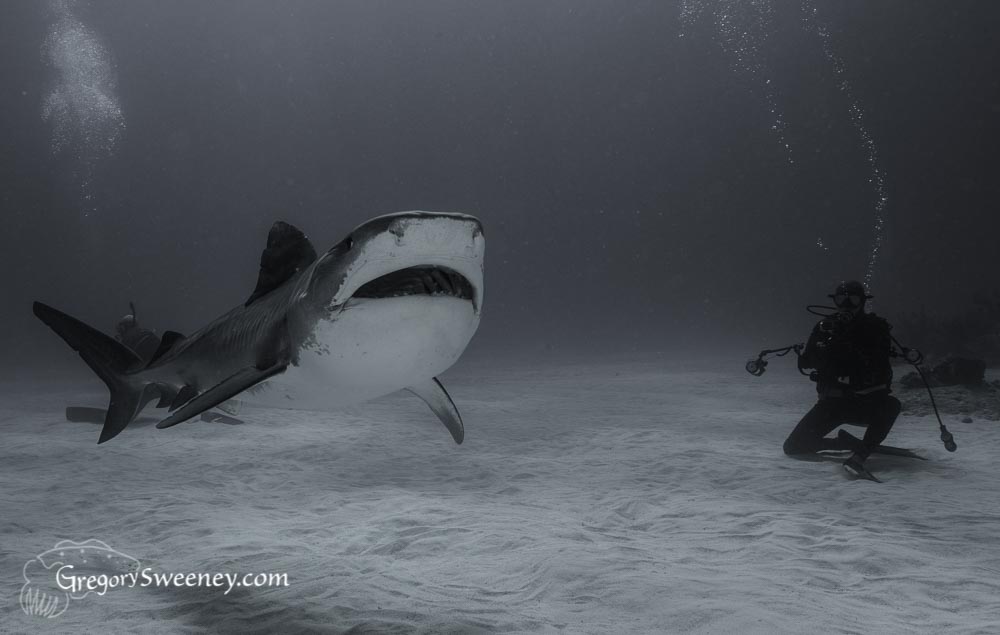
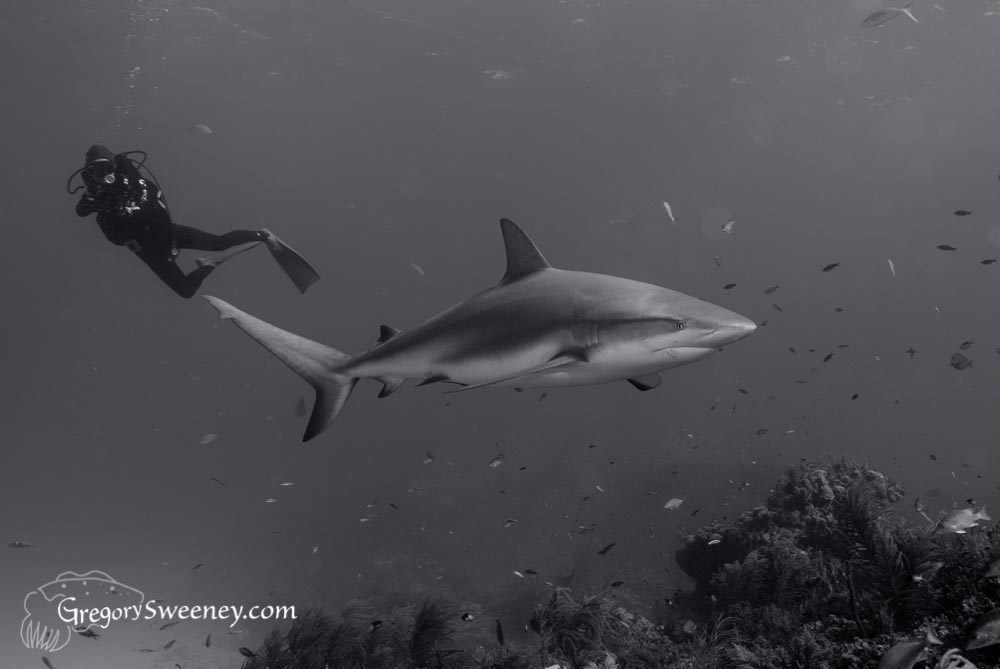
March: Tiger Sharks and Caribbean Reef Shark, Bahamas
Processed with Lightroom: Here I used one of Lightroom’s Black and White Tone presets – “Creamtone”. I then went under the Split Toning adjustments and changed the colors to cool tones in silver and blue. I increased Contrast and Clarity to sharpen the subject
Processed in Photoshop: I want to use Quadtone: 4 colors assigned according to tonal range Black, shadows, whites, highlights. First change to 8 bit and Greyscale mode. Then choose Duotone Mode. I set 4 colors all in grays and browns and set the curves of each to assign them to a tonal range. I then used a Highpass filter to sharpen. Convert back to RGB before saving.
Processed in Photoshop: I used the Black & White adjustment layer first. Then I added a Color Balance adjustment layer to boost the blues and add a cool tint. I used Levels adjustment for sharpening and contrast
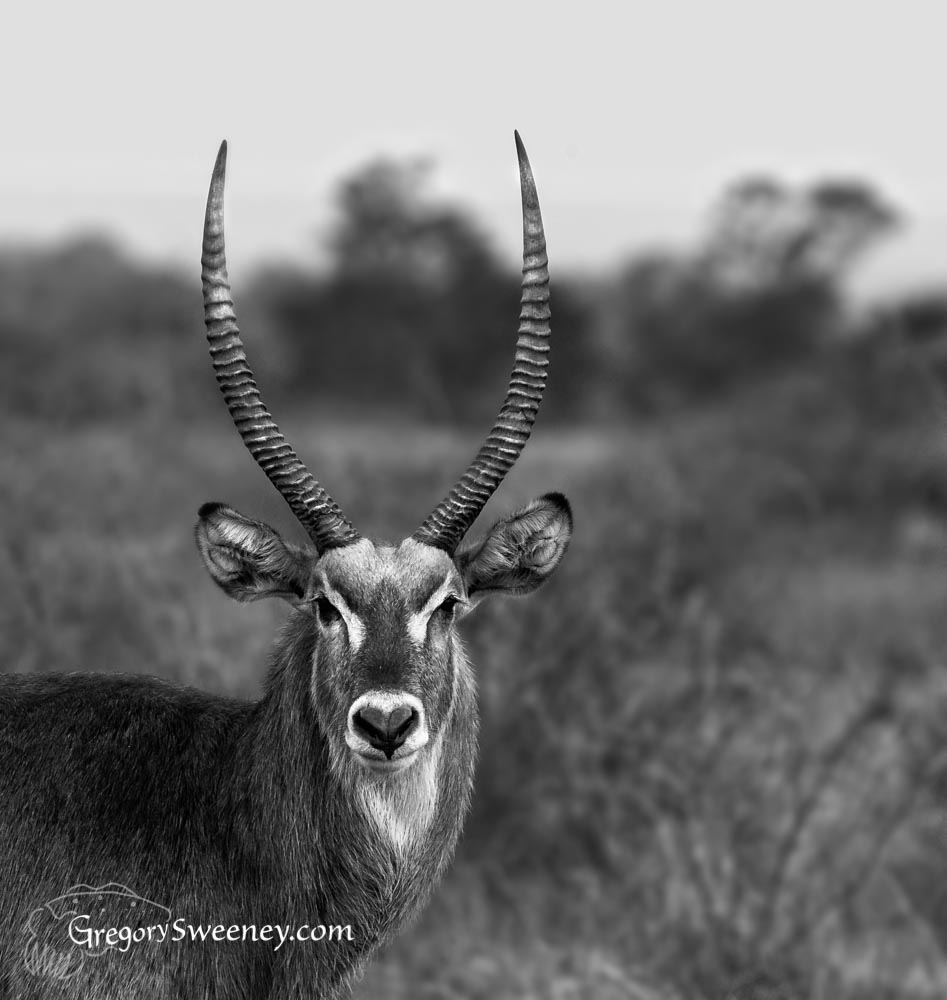
April – May: South Africa
I isolated the subject through cropping and further brought it out with darkened background achieved through an adjustment brush. I did a simple desaturation with the Desaturation slider and reducing the Vibrance. Both were reduced to around 15% leaving traces of yellow and red for a tinted effectProcessed in Photoshop: I used the Mode command to convert to Greyscale. Then used HDR Toning adjustment to starting with the Contrast preset then tweeking it to my liking. I then used dodge and burn layers to bring out the eyes and other details in the face. The HDR tone adjustment provided plenty of contrast and perceived sharpening.
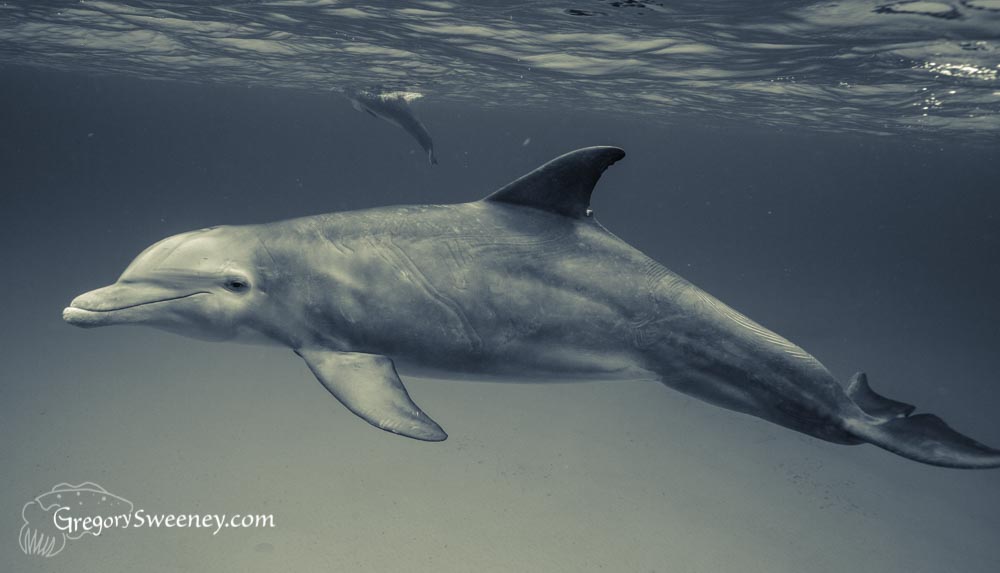
June: Wild Dolphins in the Bahamas
Processed in Lightroom: This utilizes Split Toning to do the same effect as Duotones in PS. I first optimized contrast and exposure, desaturated the image, then set tones for the lights and darks and balanced between the two as well as controlled the saturation of each.
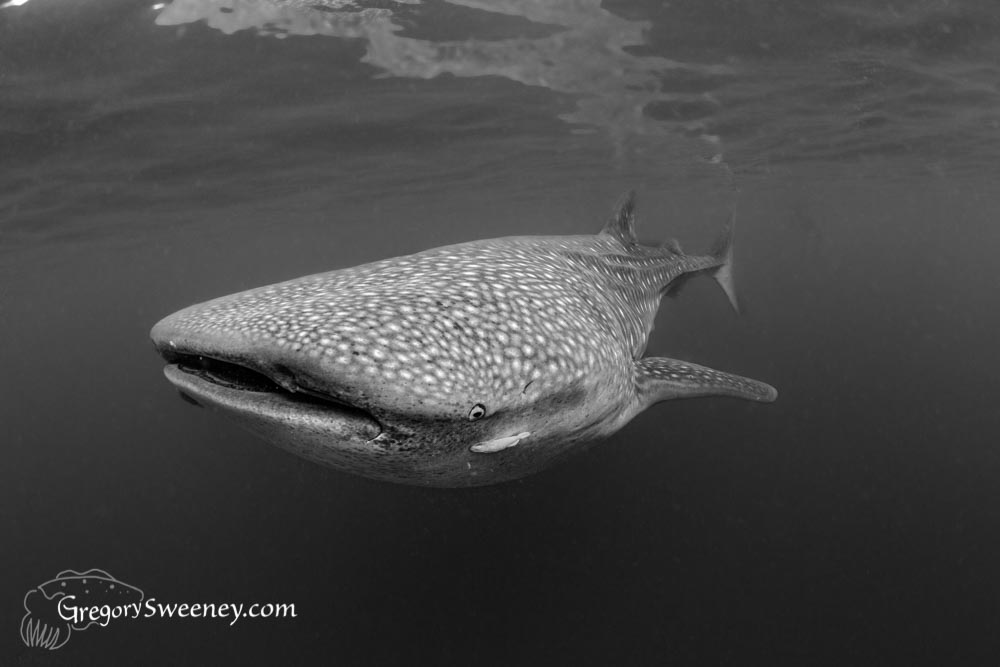
July: Whale Sharks in Mexico
Processed in Photoshop: I used the Channel Mixer to remove the color and adjust the tonality. Here I used the BW + Red filter preset to make the water dark. I used a multi layer technique to add lots of sharpening: I copy the image several times, invert one of the layers then do a surface blur on it. Two different blend modes and a mask to limit the sharpening just to the subject. I also added a Curves layer for added contrast. and some targeted dodge and burn on places like the eyes.
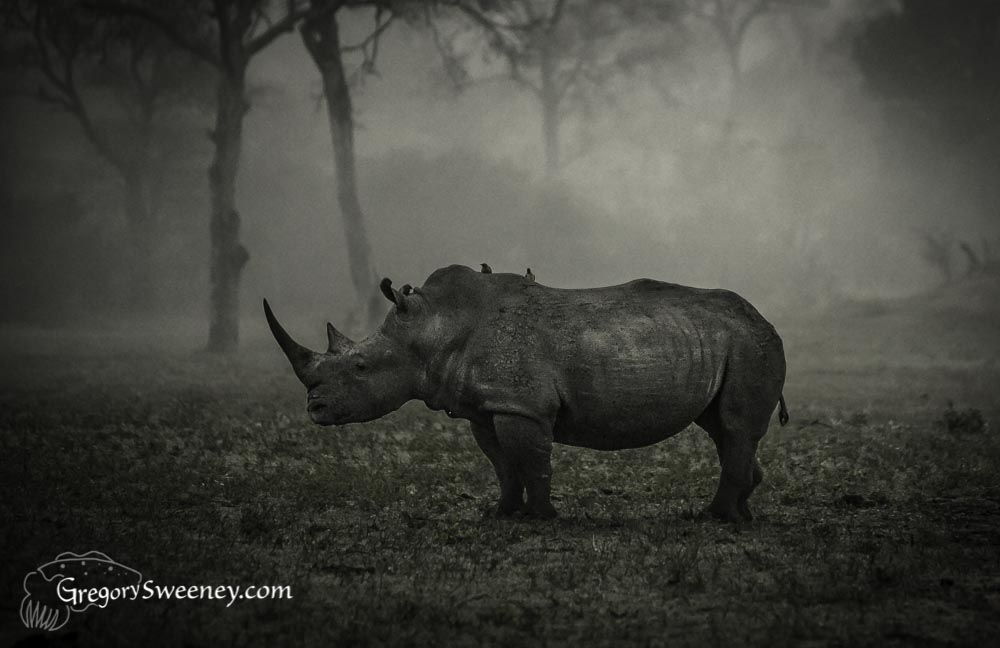
Sept – Oct: South Africa
Processed in Lightroom: This was misty and low contrast. I wanted to preserve this feeling. I achieved the tint through a White Balance adjustment and dropped the Saturation and Vibrance sliders to subdue the already subtle colors. I used a local adjustment brush on the rhino to add contrast, sharpening, and clarity to the subject. Finally I added a Post Crop Vignette to dark the edges and center attention on the rhino.
I hope this has sparked your creativity and you will start to experiment and explore ways to enhance your photos in the monochromatic realm.
Some other posts about Post Processing and Black & White